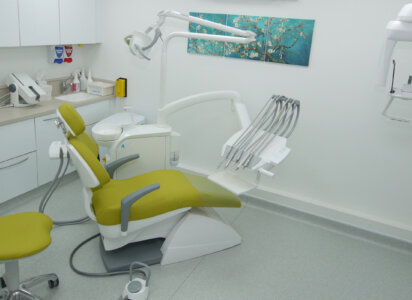
All dental practices must be kept clean and hygienic. To achieve this, the practice must meet very specific regulations and guidelines.
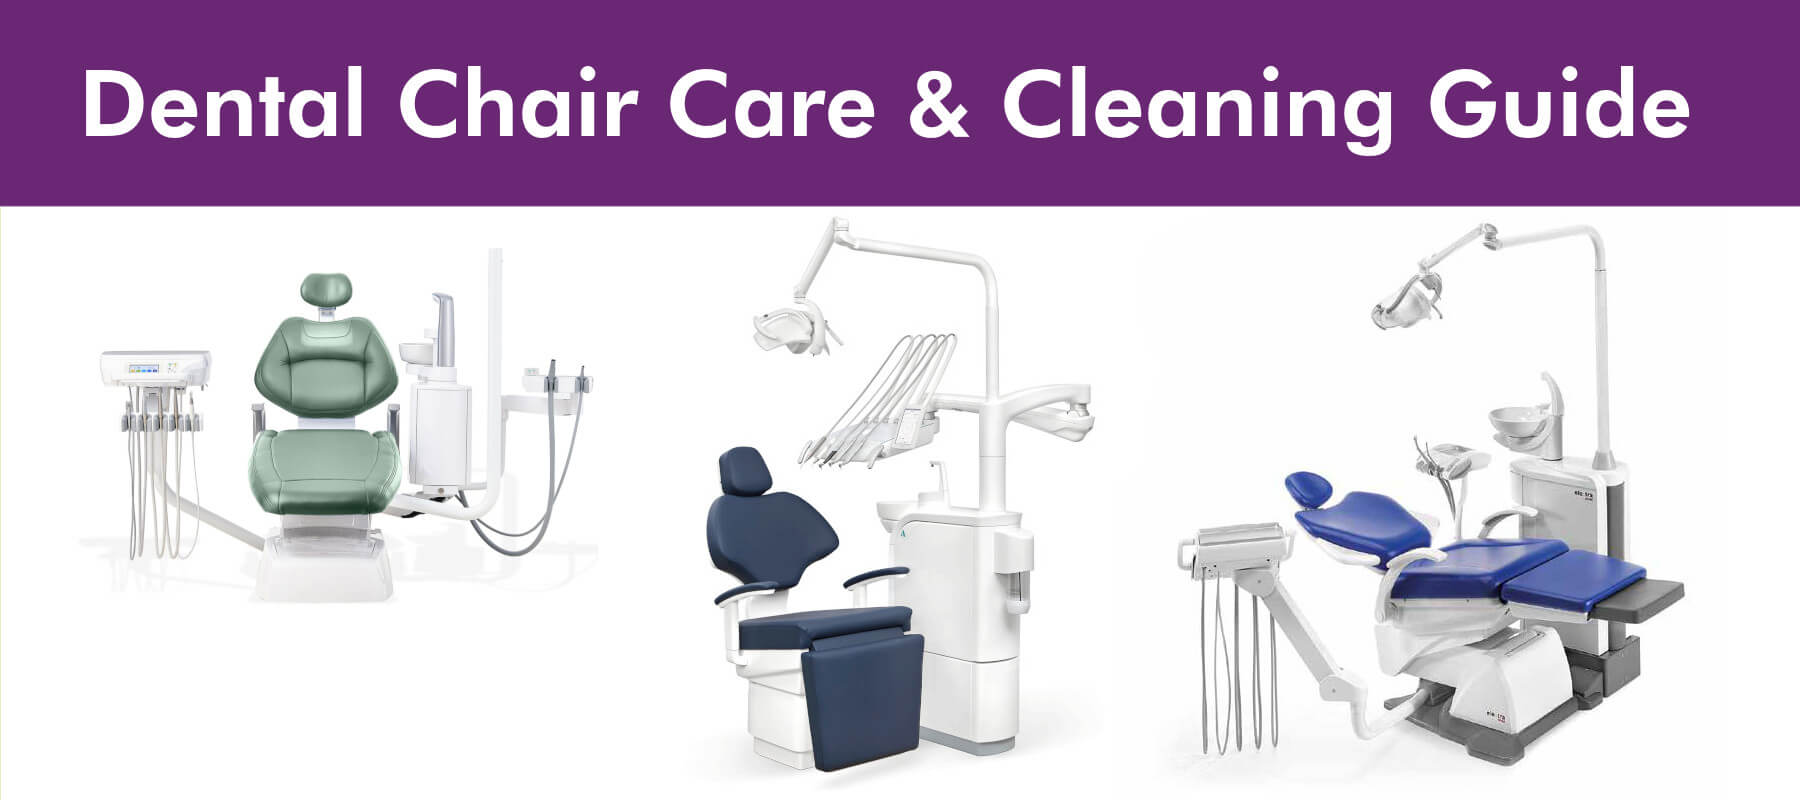
To help you and your team keep your dental chair looking its best, here are some tips and common mistakes to avoid when cleaning and maintaining it. By using these suggestions combined with an annual service plan your chair should give you many years of dependable service.
Equipment can be cleaned with a solution of mild detergent and warm water.
A variety of surface disinfectants are available for use in dental treatment rooms, but some of these can cause discoloration of plastic, painted, plated or anodised surfaces with repeated use.
This can be minimised by careful adherence to the disinfectant manufacturer’s instructions and by frequent washing with mild detergent and water. Occasional use upholstery cleaners can be used to remove stubborn stains.
Do not use powdered cleansers, scouring pads or abrasive scrubbers on any of the painted, plastic or metal surfaces of this dental unit. To remove dried-on material, use a soft-bristled brush and a solution of mild detergent.
Wherever possible, disposable barriers should be used and changed between patients. The barrier technique will ensure maximum long-term durability of the surfaces and finishes of the equipment.
The use of chemical disinfecting agents is not necessary if the instrument is going to be sterilised. While their use may be easy and quick, it is important to know the effectiveness of any chemical disinfectant against the various agents of infection that may be encountered.
When using the chemical vapor process, it is essential to rinse out all cleaning agents with clear water. The internal surfaces and passages must be thoroughly purged of residual cleaning agents by flushing with water then isopropyl alcohol. This will prevent the formation of a crystalline residue resulting from reactions between the chemical vapor solutions and cleaning agents.
Draw clear water through each valve, while opening and closing it several times. Leave the valve open for several seconds to allow all of the water to clear the hoses. The HVE and Saliva Ejector tips should always be replaced with sterile ones before each patient.
The recommendation is that you draw a vacuum system sanitising solution through each valve, while opening and closing it, every day.
The dental unit is equipped with a handpiece flush system that allows you to periodically flush fresh water through the handpiece tubing.
The need for this is caused by the low flow of water through the tubing during normal use, which can lead to stagnation and the potential growth of “biofilm” contamination.
It is recommended that you flush the tubing at the beginning and end of each day. This may be done with or without the handpieces installed, but having the handpieces on the tubing will restrict flow, so a longer flush time will be required.
All of the tubing is flushed simultaneously. Hold them together and direct them into a basin, sink or cuspidor to catch the water. Flip and hold the flush toggle.
Allow adequate time for fresh water to make its way through the entire system and displace all standing water.
To mitigate the risk of cross-contamination between patients, disinfection and sterilisation of handpieces must occur after each dental procedure. Refer to the handpiece manufacturer’s instructions and recommendations for sterilisation or disinfection procedure.
A cleaning procedure should be performed at least once a week, preferably at the beginning, before treating patients.
If the unit is to be stored for any length of time, perform a weekly maintenance routine immediately before and after storage.
1. Purge the unit with air.
2. Flush the system with disinfectant solution:
3. Allow the disinfectant to remain in the unit for 10 to 20 minutes, then flush the system again until all the cleaning solution is used up.
4. Purge the unit with air:
5. Fill with clean water:
Replace the 2in. x 2in. gauze pads with clean pads in the handpiece oil collector at least every 90 days, or more often if handpieces are oiled frequently.
Turn off the vacuum pump. Remove the solids collector cap and lift out and dispose of the screen. If you find an excessive amount of material in the screen, more frequent cleaning is necessary.
The self-contained water system is designed to optimise the quality of water being delivered to the handpieces and syringes. The self-contained water system has three functions:
1. The system may be filled with filtered or sterile water for patient use.
2. The system may be filled with disinfectant for flushing the syringe and handpiece tubing.
3. The unit can be purged with air to inhibit the growth of biofilm.
To maintain a truly asepsis water system, daily and weekly cleaning procedures must be performed in a consistent, regular manner.
Failure to do so could result in contaminated water lines and a lower water quality than what is acceptable for patient use. Follow a daily and weekly maintenance routine for proper cleaning of the tubing with the clean water system.
A new water bottle should be disinfected prior to use.
Fill the bottle with 100 ml disinfectant solution, shake vigorously and let it settle for 10 minutes. Shake again, then rinse twice with water.
It is recommended that 100 ml of disinfectant solution is mixed for each weekly bottle disinfecting procedure. Always use a fresh mixture every week.
9 parts tap water: 1 part 5.25% Sodium hypochlorite (household bleach).
The physical action of scrubbing with detergents and surface-active substances plus rinsing with water removes a considerable amount of microorganisms.
If a surface cannot be cleaned, it must be protected using barriers.
The external parts of the equipment must be cleaned and disinfected using a product effective against HIV, HBV and as a Tubercolocide (medium-level disinfectant), specifically for small surfaces.
The various chemicals used in dental treatments can damage lacquered surfaces and plastic components. It is advisable to use a specific medium-level disinfectant for upholstery and lacquered or plastic surfaces.
On metal surfaces, it is advisable to use products that contain a maximum of:
Do not use products that contain isopropyl alcohol (2-propanol, iso-propanol).
Do not use products containing sodium hypochlorite (bleach).
Do not use products containing phenols.
Do not spray the product selected directly on any of the unit’s surfaces.
All products must be used in accordance with the manufacturer’s instructions.
It is advisable to shut off the dental unit before cleaning or disinfecting external parts.
Any materials used for cleaning or disinfecting must be disposed of after use.
Before proceeding with any type of cleaning, switch off the unit and unplug it.
It is advisable to perform cleaning and maintenance tasks at the end of the working day.
Do not apply the cleaning product directly to the surface. Apply it to disposable paper and then apply it to the surface. Allow it to work for a few minutes and then remove with a clean cloth.
Use disposable paper or sterile gauze to clean the surfaces. It is not advisable to use reusable cloths.
Discard the materials used to clean the unit once you have finished.
To clean the upholstery correctly, use a soft cloth moistened with warm soapy water and then dry completely. Upholstered items do not have seams, which makes cleaning easier and enhances hygiene.
Taps can be removed for cleaning and maintenance.
1. Pull them upwards gently to remove them.
2. Clean them.
3. Check the condition of the seals. Apply a bit of neutral Vaseline if you find them difficult to remove.
4. Assemble again.
The bowl can be removed for easy cleaning and disinfection.
1. Pull it upwards gently to remove it.
2. Clean.
3. Check the condition of the seal. Apply a bit of neutral Vaseline.
4. Assemble again.
Check bowl filter for solid particles. Remove it by hand and clean any possible residue at least once a day or whenever necessary.
Clean the instrument holder using a suitable product that has been proven effective against bacteria and fungi, and broadly effective against viruses (including HBV and HIV). When using, follow the manufacturer’s instructions and the general cleaning recommendations set out in the relevant section.
Do not use abrasive or acid products.
Depending on the model, clean the air filter by connecting a 20-micron brass filter or clean it by pressing the lower filter button for a few seconds.
Adjust the pressure to 5 bar if necessary.
The unit comes with polypropylene cannulas that can be sterilised at 135ºC. See manufacturer’s specifications on the bag in which the cannulas are supplied.
The cannulas can be removed by pulling them slightly.
Fedesa recommends using disposable cannulas once they have reached their useful life cycle.
To clean the suction filters, use gloves to prevent any accidental contact with infected material.
It is located at the back of the cuspidor:
1. Gently pull the circular connector.
2. Remove the filter.
3. Place the content in a suitable waste container.
4. Check the condition of the seal and grease it lightly with Vaseline.
In a suitable container, prepare a mixture of warm water in a suitable proportion with the cleaning and disinfecting products recommended (based on Phenol. See manufacturer’s recommendations).
Let each cannula suck in this mixture, alternating fluid and air to achieve the correct level of cleanliness.
Pour the remaining mixture into the cuspidor to clean the drain.
Remove the suction solid particle filter, (as explained above), and place 1 or 2 anti-foaming pills inside.
All disinfectants must be used in accordance with the manufacturer’s instructions.
The tip of the syringe and the cone can be removed for cleaning and disinfection (see manufacturer’s instructions).
Do not immerse the syringe in disinfectants or detergents.
Products that are not recommended: abrasive products and/or those that contain acetone, chlorine, and sodium hypochlorite.
Please refer to the manufacturer’s specific instructions supplied with the instrument.
Perform cleaning and maintenance operations when the lamp is off and once it has cooled down.
Use soft, non-abrasive disposable paper to clean and disinfect (avoid using recycled paper) or sterilised gauze.
Remove the lamp’s protection shield and check the state of the reflector. Clean the reflector using a soft cloth soaked in a solution of water and neutral soap.
Do not use products containing alcohol.
The removable handles can be sterilised in a steam autoclave at 135ºC (2 bar). Minimum time: 15 minutes.
Do not use substances based on trichloroethylene, benzene, turpentine or solvents in general to clean any part of the lamp.
Do not spray the product selected directly onto the optical unit.
Any item used for cleaning and disinfection must be discarded at the end of the operation.
Replace the bulb (optional).
Check and adjust if necessary.
For any other specifications, refer to the manufacturer’s recommendations.
See the disinfection agent safety datasheet and instructions for use of the products and according to the specifications of the manufacturer.
Use the personal protection indicated by the manufacture once these products are being manipulated. Ancar recommend the Durr FD360 Cleaning Spray Fluid for Vinyl Upholstery and Durr FD366 Disinfection and Cleaning Wipes for sensitive surfaces.
Rinse the suction hoses: Aspire 0.5l of water with each suction hose.
Check the bottle water level. (Only if the unit is equipped with the “Self Water Kit”).
Ensure that the water level of the bottle is enough to supply water during all the working day. If not, a refilling process will need to be done:
1. Unscrew the bottle and remove the rest of water that might contains.
2. Rinse the bottle with clean water.
3. Fill the bottle with a disinfection solution.
4. Assemble the bottle to the unit.
Flush each instrument by activating the Flush function on the unit interface and following the indication that appear on the screen. The flushing program need to be set up for at least 2 min.
The flushing can be done by holding the instruments over the spittoon, an external container or by placing the flushing support (if the option is available with the unit).
Wipe the upholstery using a soap & water solution.
Disinfect unit surface.
Active the lock function of the Unit interface screen and disinfect the screen. Dry the screen before unlocking it.
Clean the spittoon with a brush. Rinse the spittoon with the water to spittoon function.
Disinfect the suction hoses.
Disinfect the instruments following the instructions of the instrument manufacturer.
Rinse the suction hoses: Aspire 0.5l of water with each suction hose.
Flush each instrument by activating the Flush function on the unit interface & following the indication that appear on the screen.
The flushing program need to be set up for at least 30 sec.
Empty the spittoon filter in the appropriate place (not to the waterline drain), amalgam residues must be disposed of separately.
Clean and disinfect the filter in a washer disinfector.
Clean the spittoon with a soft brush and leave the agent at least 2 minutes on the spittoon. Rinse the spittoon with the water to spittoon function. Remove the spittoon and wash and rinse with hot water.
Disinfect the suction: Aspire 1l of disinfectant solution water with the suction hoses.
Remove the suction handpieces and disinfect in a washer disinfector.
Remove the disposable suction filters, empty the filter in the appropriate place (not to the waterline drain), amalgam residues must be disposed of separately. Clean the filter with hot water.
Disinfect the waterline:
Ensure that the bottle kit is filled with a disinfection solution.
If the Dental unit is not equipped with a disinfection system or the “Self Water System Kit” the water provided to the unit will need to be duly treated with a product mentioned previously.
Flush each instrument by activating the Flush function on the unit interface & following the indication that appear on the screen.
The flushing program need to be set up for at least 2 min. duration of the flushing.
Disinfect the removable parts. Remove the parts and disinfect with a washer disinfector.
Pour 250 ml of a disinfectant agent solution to the spittoon drain. Leave the agent inside the drain at least 30 min. Rinse the spittoon with the water to spittoon function.
Disinfect the suction: Aspire 1l of disinfectant solution water with the suction hoses.
Wait 30 min of agent exposure time. Flush the suction system by aspiring 2l of water after the exposure time has elapsed.
Intensive disinfection of the waterline:
This process needs to be started at the end of the week and finalise once the next working day starts to allow the agents to actuate over the weekend.
If the dental unit is equipped with the disinfection “Metasys WEK” system:
If the dental unit is equipped with the “Self Water System kit”:
Clean the Spittoon Valve Filter (only if the unit is equipped with this valve).
Remove and change the disposable suction filters.
When the amalgam separator needs to be replaced, an acoustic signal will be activated, and a yellow light will be displayed on the CAS-1 Panel.
Replace the disinfectant agent:
Metasys WEK (only if the unit is equipped with this kit)
Once the disinfection agent is finished, an acoustic signal will be activated, and a yellow light will be displayed on the Metasys WEK Panel, stating that no more disinfectant can be drawn and the disinfect agent bottle ned to be replaced.
Self Water System (only if the unit is equipped with this kit)
Once the water level of the bottle is below the 10% of the bottle capacity or the water is finished, the refill of the bottle is needed.
In case you have run out of water before the refilling, a Flush process of at least 10 sec. will need to be done in order to expulse possible air on the waterline and ensure a normal operation.
For more information on what is involved when a dental engineer services your equipment, read our article – The Ultimate Guide to Dental Engineering. This guide covers the importance of preventative annual servicing to keep your equipment running smoothly and minimise down-time.
Dental equipment can generally last 10-15 years if properly utilised and maintained, so it is recommended to set-up a service schedule for all maintenance and certification intervals.
We can contact you when required to book work in at your convenience giving you peace of mind that your machinery will remain compliant and in safe working order.
Disclaimer: his information has derived from the manufacturer’s maintenance and cleaning documentation.
I have used them for the first time in recent months for a complicated project in carrying out a practice refurbishment. Eclipse were meticulous and brilliant. Very knowledgable engineers and a beautiful finish to my practice. They really are a family based business who will look after you. Very professional company and will definitely keep using them.
I had my 2 surgery practice completely stripped out and services repositioned with new flooring, new equipment and redecorated. They kept to the agreed time scale and we were up and running in our state-of-the-art new surgery. Thank you Eclipse and I will be using your services again.

I did a lot of research looking for a dental fit-out company before I came across Eclipse Dental. They designed the surgery exactly the way I wanted it to look which suits my requirements perfectly. The final result was phenomenal, just phenomenal!
The engineers that attend our practice are very knowledgeable and always act in a professional manner. If we have an emergency situation John Boyt always tries his best to fit us in. I have no hesitation in recommending Eclipse Dental Engineering to you for all your servicing and breakdown needs.
Eclipse listened to my ideas, they added a lot to them and improved my initial design. They had loads of realistic and creative ideas for a 21st century dental practice! Two surgeries were refurbished on time without any interruption of our clinics.

We would highly recommend the awesome Eclipse team who guided us through the design process, finishing touches and colour schemes. Their ability to combine build works with equipment and dental engineering makes it so much easier and better value.
I am very pleased with the result, it is of a high quality and surpassed my expectations, on the strength of the work done I commissioned some extra wall cabinetry. The whole process was hassle-free and I would be very happy to recommend Eclipse to my friends in the business.
We used Eclipse recently in an emergency as we had equipment failure. They were very quick to respond to our call and were able to get us working again within 2 hours. The engineer was very friendly and professional and I would highly recommend this company.

I would like to express my gratitude to you and your team for your professionalism and prompt response when our dental chair packed up. You attended the same day, removed the damaged chair and installed a rental to allow us to continue practising.
Having dealt with many fit-out companies over the years, Eclipse Dental has been one of the most professional, dependable and sincere companies I have ever worked with. I would not hesitate to use their services again.
Excellent service, Eclipse have worked tirelessly for us and have always come out same day if we have a problem stopping us working. Thanks to all at Eclipse.
Their awareness of CQC regulations regarding equipment relocation and our necessity to minimise downtime was brilliant. We would like to recommend Eclipse Dental to anyone considering a refurbishment or relocation.
Very happy with the service and reliability of the team. From the beginning to the end, everyone was always helpful and very kind. I definitely will recommend Eclipse Dental!

I liked how swiftly the projects were done. Everything was managed, everything was timed and everything was coordinated. And every day we saw something happening. It was very exciting.

The quality of craftsmanship was exceptional—the cabinetry, flooring and all custom elements were made precisely to our specifications and aligned perfectly with our vision for the space.
Brilliant. Just professional! Complete refit of surgery. Flawless.
The boys did well! We didn’t give them much time to prepare but they did a great job, extremely pleased.
We have had the chairs for some time now and are happy with them. They serve what we need them for. The aftercare service is excellent

Eclipse are very flexible and listen to your needs. We are very impressed with the quality of workmanship they delivered. I would not hesitate to continue recommending Eclipse.
Eclipse were always accommodating of any requests and would always go the extra mile. I look forward to working with them for many years to come.

We are delighted with the end result. The practice looks good and, more importantly, works ergonomically and efficiently.